POWERFUL PLANOGRAMS WITH FLOOR PLANNING
FEATURE-PACKED PLANOGRAM SOFTWARE
PROFESSIONAL PLANOGRAMS IN MINUTES
COMING SOON
CHANGE AND VIEW PLANOGRAMS ON THE GO
VIEW PLANOGRAMS ON THE GO
RESIZE PHOTOS WITH QUICK AND EASE
PRODUCTS
SERVICES
COMPANY
RESOURCES
FREE TRIAL

CATEGORY MANAGEMENT
REPORTING CAPABILITIES
RIP PROCESSOR
ADDITIONAL FEATURES
SALES ANALYSIS
ENTERPRISE EDITION
BUY NOW
FREE TRIAL
RIP PROCESSOR:
BUILD PLANS WITH JUST A CLICK
Enterprise Edition has three distinct Auto Build methods for the automatic creation of planograms. Known as RIP (Rapid Item Placement) Processors, you can use them in a variety of ways to create all or part of a plan.
RIP 1
The first RIP Processor (aptly named "RIP1") works based on a list of UPC Codes in order from top left to bottom right on the plan. This list can come from an Excel file, word processing file, or through the use of a scan gun to scan in UPC Codes from an actual display. For pegs, you can fill an entire row at once. For shelves, not only can you fill all of them, you can start with no shelves and let RIP1 place the shelves for you.
BEFORE: An Empty Plan with No Shelves
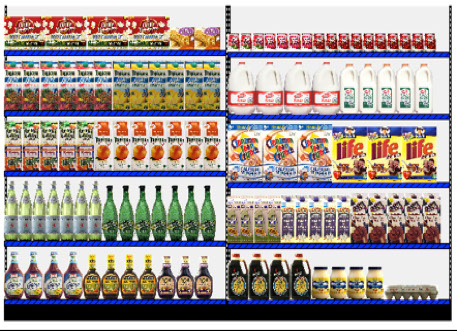
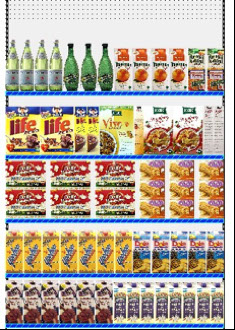
AFTER: Completely Auto Built Plan with Shelves and Products
RIP 2
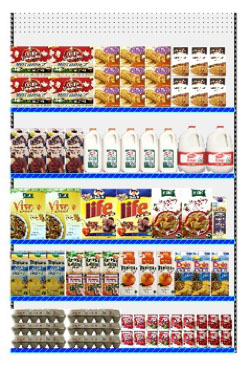
Our second RIP processor, named RIP2, is similar to RIP1. However, with RIP2, you can use fields other than UPC to identify the product. You can even assign the number of faces or products, as well as how high and wide the faces are placed. You can let RIP2 automatically create multiple facings using three different methods.
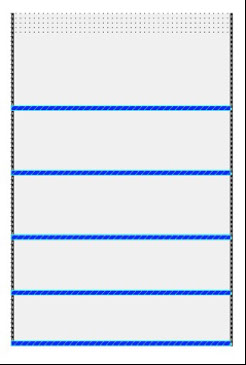
BEFORE: An Empty Plan with Shelves
We first assign products from top left to bottom right and the number of products desired. Then we ask the program to first fill vertically, then stack products behind one another. Finally, if the number of products are not reached, we take out additional horizontal facings until the target number is reached.
AFTER: Products with Multiple Facings Placed
RIP 3
Our third RIP Processor works differently than RIP1 and RIP2. With RIP3, you place products not by the number of products, but by the linear space allotted for each product. For example, one product can have 8 inches of linear shelf space, another can have 12 inches of linear shelf space, and so on.
You can place the products on any side, front side or top, and determine the merchandising style to be used. If there is any available space leftover, the product can be optionally capped horizontally and vertically.
In the plan shown below, we assign products from top left to bottom right and the number of inches assigned to each product. We have selected the option to cap some of the products if there is room.
BEFORE: An Empty Plan with Shelves
AFTER: Products Placed by Linear Space
The first two products on the top shelf are given 12 inches of space each. The third product is given 16 inches of space, and the fourth product given 6 inches. This adds up to the 48 inches of shelf space available.
Notice that the products on the second to top shelf are capped. Since there was space left over after two Life Cereal faces were placed, horizontal capping was requested and there was room for two capped faces placed on their side.
PRODUCTS
SERVICES
RESOURCES
COMPANY
CONNECT
How to Order